
If You Can’t Buy it, Grow it: Guide to Outdoor Cannabis in Long Beach, NY
Updated: 5 days ago
If you can grow tomatoes, you can grow cannabis, weed, chronic, marijuana, chiba, chrome, green or whatever you like to call it. I’ve been growing cannabis outdoors in the City by the Sea since before New York state officially legalized recreational consumption. At the time, I had a medical marijuana license for treating my anxiety about not having easy access to cannabis at all times (Long Beach still does not have a recreational dispensary). But a license is no longer needed to make the most of the warmer months in LB and venture into a little outdoor grow of your very own. After all, it’s not unusual to have fun with anyone...on weed.

Maybe you’ve thought about growing, researched it, quickly gotten overwhelmed and eventually well…here you are. That’s great, because after years of dabbling with different seeds, pot sizes, and soils by the seaside - In my excitement I’ve made quite a number of mistakes which you no longer have to. At the end of the day, curiosity killed the cannabis. Like Bill Withers said, I learned I outa leave young thing alone…young seedling that is.
Complicated nutrients, watering schedules, pruning techniques, tracking hours of daylight. Let’s throw it out the window. Don’t worry bout-a-ting. Just walk this way, talk this way, and give me a KISS (keep it simple stupid). Here are a few tips and tricks for a successful outdoor grow in Long Beach, NY on your very first go around.

Autoflower Strains for LB Outdoor Grows
Our ocean air and late summer rain make it difficult to grow full photoperiod plants outdoors without mold and rot ruining your big beautiful buds, so listen bro. If there is one thing I have learned, autoflower is your best bet for achieving a mold free yield. Auto what?
When you choose to grow an autoflower strain, your seedling is not just guaranteed to be a female, but is also guaranteed to fruitfully flower to fruition in as little as 10 weeks, independent of what the sun is doing. This is in contrast to photoperiod strains that rely on shifting hours of light and dark, in order to push the plant into a flowering state, with an eventual harvest toward mid to late October. All that extra time the photoperiod plant takes to mature (2.5 Months longer than autoflower) is what opens the door to mold growth, and it is pretty much guaranteed to happen here in Long Beach.
So stick with autoflower and later you can thank me for a real good time. I ordered mine from Growers Choice Seeds. They provide a guarantee, and provide simple instructions on how to germinate and plant them. Get your seeds germinated by late May early June the latest, and you can be enjoying some of life’s simple pleasures by mid August.

Pots for Your Pot
In general, autoflower does not grow nearly as big as photoperiod plants do. They stay rather short at about 2’ - 3’ depending on the strain, making them ideal for planting in smaller pots, allowing you to keep them mobile and movable around your yard, porch or deck. As a general rule of thumb though, the taller and wider your planter, the taller and wider your plant will grow. I like to use 10 gallon fabric grow bags as they offer a nice ratio of height and width, and have resulted in some of my largest yields to date. They come with handles, again for easy relocation around your property, and you can grab a pack of 10 on amazon for just around $25 bucks. They will last you multiple seasons.

Soil & Nutrients
You can purchase new organic potting soil with vermiculite (the white stuff) from your local gardening center, or you can opt to use any potting soil you have hanging around in old planters in your yard. No matter what soil you use, old, new, organic or not, the key is to ensure the soil contains adequate nutrients.
Autoflower grows fast, and demands a lot of nutrients from your soil in a very short period of time. I have found that newly purchased organic growing soil can fall short on delivering all the nutrients that autoflowers need for a full healthy flowering phase.
But instead of opting for liquid nutrients and a complicated ever evolving feeding schedule, I recommend the set it and forget it approach of mixing ample amounts of Bat Guano and Worm Castings in with the soil before planting. In my case, after harvest each season, I let my soil sit in the bags throughout the winter (where else am I going to put the soil), and come Spring/Summer I simply amend the soil with more bat guano and worm castings. No need to go out and buy expensive heavy bags of soil every season. Amending your soil is financially prudent, and allows you to proceed with your grow worry free knowing your plants have all the nutrients they will need. You can find both Bat Guano and Worm Casting on Amazon as well.
Sun & Water
If you follow this approach (autoflower strain with well amended nutrient rich soil), the only ongoing task will be keeping your beauties watered and sun drenched. When it comes to watering, there is just one rule. Don’t over water! While it's admittedly difficult to not pamper your precious plants, they don’t necessarily need water every day (unless every day the soil goes completely dry). Overwatering will lead to root rot, and it will stifle your plant’s growth or even kill your plant.

Like any plant, your cannabis will talk to you. When it needs water, the leaves will droop down. When the plant is happy, the leaves stand up, and will even angle up toward the sky. It is better to wait till the leaves tell you water is needed, than to mindlessly water every day. Eventually you should be able to gently pick up each planter and immediately know whether it needs watering just based on its weight.
Toward the later stages of the flowering period, as you head toward harvest, you’ll notice the plants start to consume less water. The pots will seemingly remain heavy for days. Make note, and back off your watering frequency. Overwatering at this time will lead to root rot or extra humidity in the buds that will cause bud rot and all your efforts will be for naught!
Senescence, Trichomes & When to Harvest
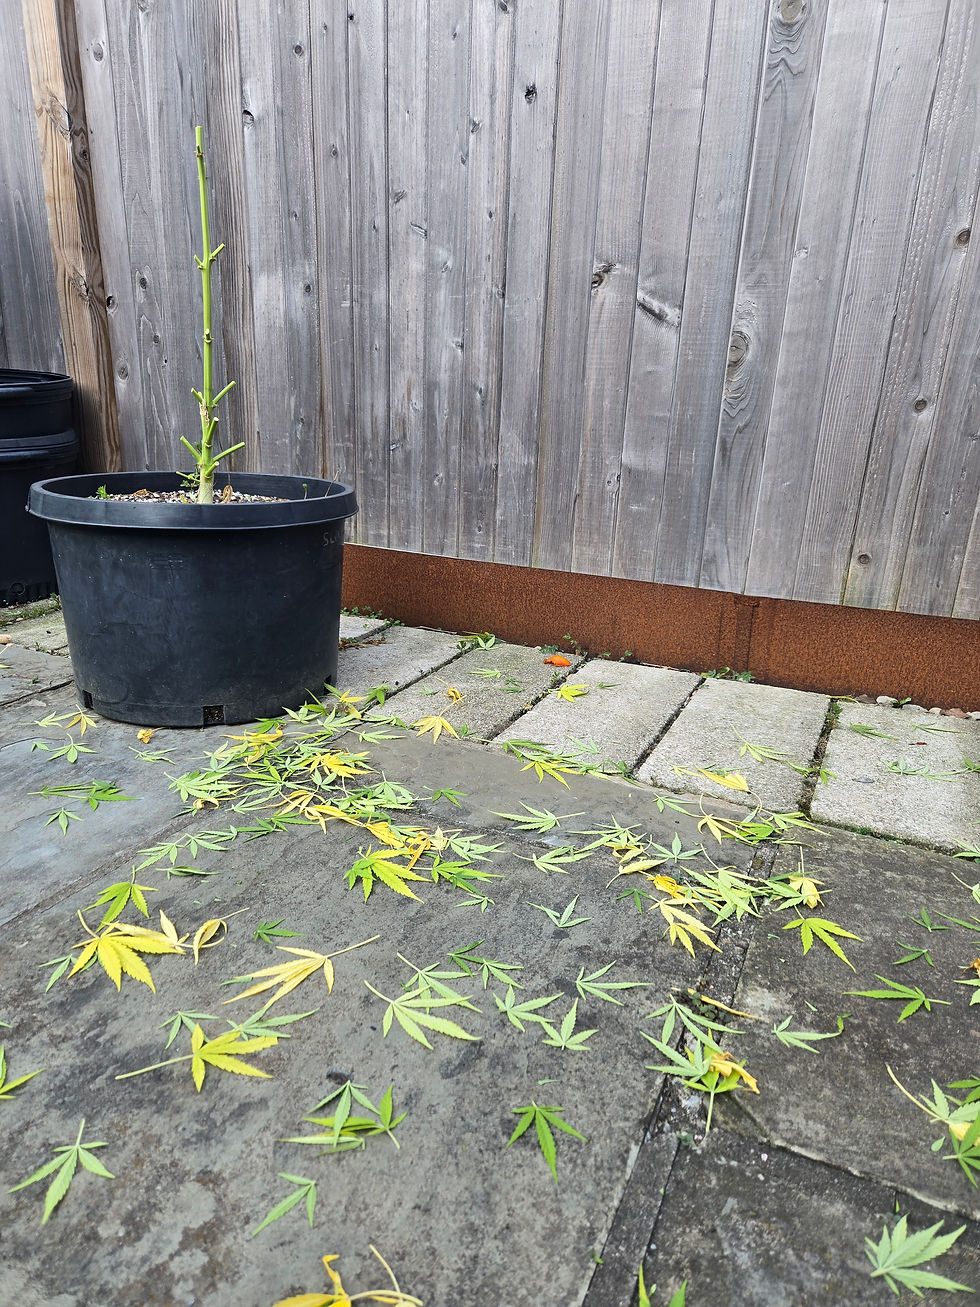
So how will you know when to harvest your weed? The first sign that you’re heading toward harvest is senescence. This is when your big and medium size fan leaves on the plant begin to turn yellow. Don’t do what everyone thinks your gonna do and just flip out! You’ll notice your buds still look great. This is a sign that the plant is pulling all the nutrients it can find in order to fuel the completion of the flowering process. Leave the leaves to yellow, brown and eventually fall off on their own.
As the large leaves fall away, the next thing to look for is browning in the trichomes….you know the tiny ‘crystals’ that cover the buds. If you look closely with a 10x magnifying loupe, you’ll see they are shaped like little tiny mushroom headed objects. The trichomes turn from clear, to cloudy, and eventually to an amber/brown. You can harvest as soon as you observe a noticeable mix of amber and cloudy headed trichomes.

Autoflower strains can be tricky though, and some trichomes will never fully turn, and just stay cloudy. That’s ok. You can wait it out if you like to see if they brown. But don't wait too long. If it's supposed to rain heavily, and you are on the cusp of harvesting, it's best to just harvest vs lose it all to weather damage and bud rot at the tail end.
On that note, have a plan for extreme weather events. Try to anticipate strong wind or heavy rain, and be prepared to provide emergency shelter.
Harvesting is not an exact science, just don’t wait too long, but also don't shake the tree when its fruit aint ripe! Recall that nearly all autoflower strains take just 10-12 weeks from seed to harvest.
Cutting and Curing Your Cannabis Creation
Excuse my aliteration, this is the exciting part. When that fateful day comes (it's up to you), you can begin by cutting down the main cola, and the remaining individual branches coming off the main stem. I grab a large black construction bag since it has no perfumy scent to it and blocks out UV.
You can use basic kitchen scissors to cut down each plant. As you go stem by stem, focus on nipping off anything that isn't flower, or looks rotten/moldy, before throwing it into the bag. Next, head over to your mom's house!

If your mom is so willing, find a small space in the home. A rarely used closet, or a tiny bathroom. Place a dehumidifier in the space and set the humidity level between 55 and 65. Angle the dehumidifier so that the vent blows on the plants. This ensures air is circulating around the buds, accelerating the drying process and preventing any potential mold growth from starting.

After your parents get perturbed about the odor, ensure them it will only be 7 days Max.
Then a week later tell them a few more days. By then they won't even notice the smell after living with it for so long. In reallity expect 1-2 weeks for a full dry depending on the size and condition of the space you're using. Once the stems at the base of each bud become brittle enough where you can simply bend them and they snap off the main stem with ease, you are in the green, and in the green!

Grab some scissors, some clean mason jars, and get to work. This is one of the most rewarding moment, where you get very hands on, up close, and personal with your sticky icky ooh ooh. No need to pack the jars tight. Just fill them loosely with flower and cap them. After waiting over 12 weeks, it is understandable that you will want to sample your wears immediately, and yes, you absolutely can! But it is often recommended to leave the jars shut and in the dark for a few weeks for an appropriate cure, opening (burping) them every few days to let moisture out and fresh air in. Honestly....I almost never do this, and just proceed to tap the stash...and it just gets better over time!
So take a load off fanny, get your jars ready, and remember: when harvest day finally arrives, you don't have to carry the weight alone—just share it with the porch crew.
Happy growing, Long Beach. Smell you around the neighborhood.
Comments